How To - Chains
Whether you are assembling a new bicycle or your chain has succumbed to chain stretch, changing out or installing a chain can be an intimidating, dirty job if you don't know what you are doing. Luckily, the process is very straightforward. Let's dive in!
First, we have to understand the basic nature of a bike chain. It consists of a repeating set of links connected by rivets (also known as pins). Over time, the holes through which the chain rivets pass can elongate due to the strain of powerful pedaling stokes. This is called "chain stretch" and can make your chain slip while shifting or when pedaling powerfully.
Installing or removing a chain requires a small, affordable tool called (simply enough) a chain tool. This specialized tool consists of a cradle that holds the chain in place, and a small driving pin attached to a handle. When the handle is turned, the driving pin moves forward steadily and presses a chain rivet into or out of position.
Time required: 10 minutes
Tools required:
- Chain
- Chain Tool
- Gloves
- Rag
Remove a chain
Step 1: Let's start by removing the older chain. Position your chain tool so the chain sits securely in the cradle. Hold the chain in place with a finger or a rag.

Step 2: Turn the handle of the chain tool to extend the driving pin. Continue slowly advancing until you make contact with the rivet.
Step 3: Do not push the rivet all the way through the chain! Unless you are replacing the chain with a new one, you will need that rivet to remain in place. Push the rivet carefully until it is just sitting in the outer plate of the chain link opposite the driving pin.
Step 4: Now the chain can be separated. Pull the links gently apart on either side of the rivet you removed and the chain will release. You may have to wiggle it slightly side to side.
Step 5: To remove the chain, pull gently on one end and it will unwind.
Install a chain
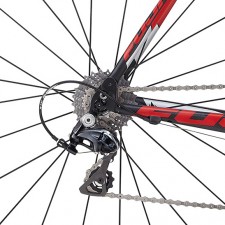
Step 1: To install your new chain, you will have to wrap it around the rear derailleur properly. Start by shifting to you smallest rear cog.

Step 2: Take your new chain in hand and feed it manually around the freewheel.
Step 3: Now you can loop the chain around the back end of the rear cassette, feeding the chain links slowly onto the smallest cog.
Step 4: Move the chain forward slowly (move too fast and the whole thing will unwind), then loop it onto the top of the smallest chainring. Slowly pedal to advance the chain around the chainring.
Step 5: Grab the two free ends of the chain, which should be hanging from the front chainrings and the rear derailleur respectively. The length of the chain should pull the rear derailleur forward and make the chain taught. You may have to remove chain links to make your chain the proper length (most chains come long).
Step 6 If you have to remove chain links, use your chain tool to push the rivet out of place as you did earlier, leaving the rivet in place as your means of reconnecting the chain. For this step, you have to make sure that one end of the chain consists of an outer plate with the rivet seated on the edge, and an inner plate with no rivet. This should make intuitive sense; like an electrical plug and a power outlet, the two ends should be able slot together nicely with the rivet connecting them.
Step 7: Now let’s connect the chain. Grab your chain tool once again, and seat each end of the chain in the cradle with the rivet extending towards the pin driver. Turn the handle on the driver to push the rivet forward and back into place. Once the rivet is flush with both side of the chain link, you are all done!
Step 8: Look over your new chain carefully. All the rivets should be flush with the outer edge of the chain links. Now take it for a test ride!
